本文版权归作者所有,欢迎转载,但未经作者同意必须保留此段声明,且在文章页面明显位置给出原文连接,否则保留追究法律责任的权利。
转载自夜明的孤行灯
前面有一篇文章介绍了用TWL进行布局,最近做其他java的东西接触到了table-layout,用着很不错,仔细看来一下文档,原来还支持libgdx。
简单试用了一下,比TWL好使多了。
TABLELAYOUT简介

TABLELAYOUT是一个轻量级的UI组件布局库。使用表格实现,有点像HTML的TABLE。
它支持libgdx, Swing, Android和TWL。支持Java API和配置文件两种方式。
同时有个配套的编辑器http://table-layout.googlecode.com/svn/wiki/jws/editor.jnlp
使用配置文件
其实最好的方法应该是使用配置文件,这样便于修改,还可以利用工具进行可视化编辑。但是libgdx对于配置文件的支持好像没有很到位(或者是版本修改等等问题)。
所以先介绍配置文件方式。配置文件的具体书写格式请参考table-layout主页。
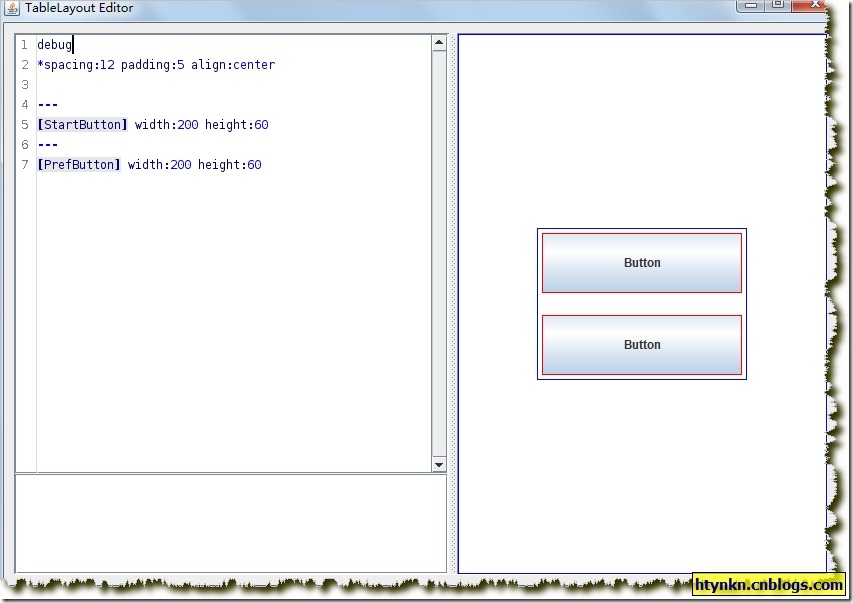
打开编辑器,绘制一个简单的游戏界面,包含一个开始按钮和设置按钮。

配置文件如下:
debug
*spacing:12 padding:5 align:center

---
[StartButton] width:200 height:60
---
[PrefButton] width:200 height:60
那个debug是显示边框的,方便调试。空间以对应的类型为结尾,比如StartButton就是按钮。
第二行定义的是全局样式。还有很多其他样式可以定义,我个人觉得很Css盒子模型很接近。
将文件保存为main.layout。
因为TableLayout是在Stage中使用的,所以很其他的Actor的用法雷同。先添加一个table,在从table中获取TableLayout。然后定义控件,并和配置文件中的名字一一对应注册进去,最后加载配置文件。
先新建一个table并添加到stage中
Table table =new Table(skin);
stage.addActor(table);
然后获取TableLayout
TableLayout layout = table.getTableLayout();
创建控件以后进行注册
layout.register("StartButton", StartButton);
其中第一个是配置文件中的名称,第二个是你代码中的名称。
最后加载配置文件
layout.parse(Gdx.files.internal("layout/main.layout").readString());
看一下完整的代码
package com.cnblogs.htynkn;

import com.badlogic.gdx.ApplicationListener;
import com.badlogic.gdx.Gdx;
import com.badlogic.gdx.graphics.GL10;
import com.badlogic.gdx.graphics.g2d.BitmapFont;
import com.badlogic.gdx.graphics.g2d.stbtt.TrueTypeFontFactory;
import com.badlogic.gdx.scenes.scene2d.Stage;
import com.badlogic.gdx.scenes.scene2d.ui.Skin;
import com.badlogic.gdx.scenes.scene2d.ui.TextButton;
import com.badlogic.gdx.scenes.scene2d.ui.tablelayout.Table;
import com.badlogic.gdx.scenes.scene2d.ui.tablelayout.TableLayout;

publicclass App implements ApplicationListener {
Stage stage;
@Override
publicvoidcreate() {
stage =new Stage(Gdx.graphics.getWidth(), Gdx.graphics.getHeight(),
true);

Skin skin =new Skin(Gdx.files.internal("skin/uiskin.json"));
Table table =new Table(skin);
table.width = Gdx.graphics.getWidth();
table.height = Gdx.graphics.getHeight();

stage.addActor(table);
TableLayout layout = table.getTableLayout();
TextButton StartButton =new TextButton("Start game", skin);
layout.register("StartButton", StartButton);

TextButton PrefButton =new TextButton("Settings", skin);
layout.register("PrefButton", PrefButton);

layout.parse(Gdx.files.internal("layout/main.layout").readString());
}

@Override
publicvoiddispose() {
stage.dispose();
}

@Override
publicvoidrender() {
Gdx.gl.glClear(GL10.GL_COLOR_BUFFER_BIT);
stage.act(Gdx.graphics.getDeltaTime());
stage.draw();
}

@Override
publicvoidresize(int width,int height) {
}

@Override
publicvoidpause() {
}

@Override
publicvoidresume() {
}
}
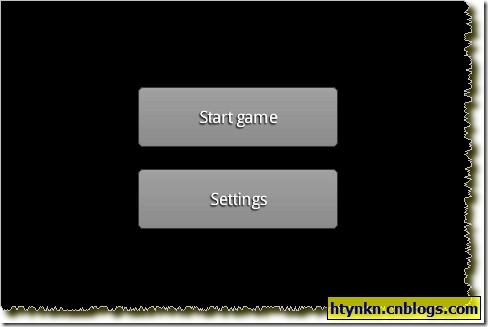
运行效果如下:

使用API配置
使用代码控制其实和配置文件差不多,我比较推荐先用编辑器生成配置文件,然后在根据配置文件写代码。
通过table.defaults()设置全局样式,就是配置中的第二行。参照刚才的配置文件,我们的代码应该是:
table.defaults().space(12).align("center").pad(5);
通过table.add()添加
table.add(StartButton).width(200).height(60);
配置文件中的—-代码新起一行,代码中用table.row()实现。
完整代码如下:
package com.cnblogs.htynkn;

import com.badlogic.gdx.ApplicationListener;
import com.badlogic.gdx.Gdx;
import com.badlogic.gdx.graphics.GL10;
import com.badlogic.gdx.graphics.g2d.BitmapFont;
import com.badlogic.gdx.graphics.g2d.stbtt.TrueTypeFontFactory;
import com.badlogic.gdx.scenes.scene2d.Stage;
import com.badlogic.gdx.scenes.scene2d.ui.Skin;
import com.badlogic.gdx.scenes.scene2d.ui.TextButton;
import com.badlogic.gdx.scenes.scene2d.ui.tablelayout.Table;

publicclass App implements ApplicationListener {
Stage stage;

@Override
publicvoidcreate() {
stage =new Stage(Gdx.graphics.getWidth(), Gdx.graphics.getHeight(),
true);

Skin skin =new Skin(Gdx.files.internal("skin/uiskin.json"));
Table table =new Table(skin);
table.width = Gdx.graphics.getWidth();
table.height = Gdx.graphics.getHeight();
table.defaults().space(12).align("center").pad(5);
TextButton StartButton =new TextButton("Start game", skin);
table.add(StartButton).width(200).height(60);
table.row();
TextButton PrefButton =new TextButton("Settings", skin);
table.add(PrefButton).width(200).height(60);

stage.addActor(table);
}

@Override
publicvoiddispose() {
stage.dispose();
}

@Override
publicvoidrender() {
Gdx.gl.glClear(GL10.GL_COLOR_BUFFER_BIT);
stage.act(Gdx.graphics.getDeltaTime());
stage.draw();
}

@Override
publicvoidresize(int width,int height) {
}

@Override
publicvoidpause() {
}

@Override
publicvoidresume() {
}
}
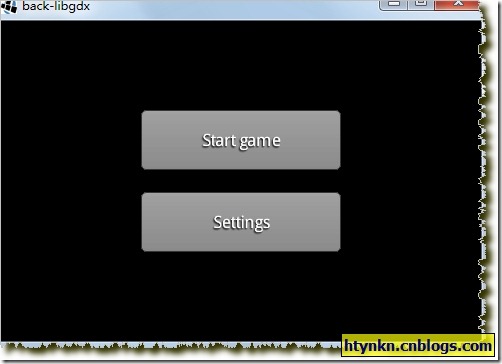
效果是一样的:

再谈Skin中的中文支持
参考前文使用TTF字库实现了中文支持,但是Skin默认支持的是Hiero。
要使用TTF字库也可以,不过就不能使用配置文件模式了。
我一般比较偷懒,先读入配置文件,在新建一个Skin,将其中的Font改成TTF字库的Font就可以了。
Skin skin1 =new Skin(Gdx.files.internal("skin/uiskin.json"));
Skin skin =new Skin();
skin.addResource("default-font", font);
TextButtonStyle buttonStyle = skin1.getStyle("default",
TextButtonStyle.class);
buttonStyle.font = font;
skin.addStyle("default", buttonStyle);
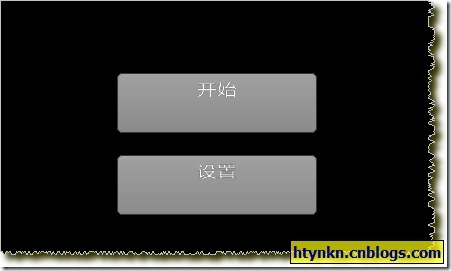
效果:

说实话这个效果真心没有英文看着好,所以推荐还是制作Hiero来用吧。
写在最后
使用TABLELAYOUT好处相当明显,它使用逻辑性的表格而不是像素定位,极大的方便了开发。同时也增加了自适应性。而且一次学习可以用到多个地方,比如Android和Swing。
Libgdx是一个相当活跃的项目,很多代码和包都发生了变化。本博客的代码一定是运行成功以后截图分享给大家的,但是不能保证随着时间推移它依然有效。比如Skin部分就发生了非常大的变化。
遇到找不到包或者没有对应方法的时候请先看看官方说明,重要的变动会在声明中提到的,比如0.96就变动了本文介绍的TABLELAYOUT和SCENCE2D。或者在社区搜索一下,一般都有人提问。
本文使用的Libgdx是0.96发行版…不要使用nightly,变动太多了。
参考:http://www.badlogicgames.com/wordpress/?p=2483
本文版权归作者所有,欢迎转载,但未经作者同意必须保留此段声明,且在文章页面明显位置给出原文连接,否则保留追究法律责任的权利。
转载自夜明的孤行灯